Many of you know I recently purchased a new home. I purchased in Early December of 2017, and being the beginning of Winter (even in South Texas) I had no occasion to run the sprinkler system until recently.
Now that the weather has been nice and warm, and lacking any rainfall, it was time to get started.
My Short back-story of frustration
Before we get to the PI (You can skip down if you want), let me just tell you about whoever put in this system. I’m fairly certain it was the new guy on his first day, and he didn’t know what a sprinkler was. Every sprinkler head in the yard sits well above ground level (this is just the canister mind you), and when they run, the extension riser pops up another 4 inches.
I had a couple of non-functional heads, so I headed to the big-box home store in town, and found some half-sized heads. Great. 4 and a half hours and 6 replaced heads later (lot’s of digging), the sprinklers are running well with no geysers or bubbling springs going in the yard.
Now we come to the incredibly awful Toro control box. I’m sure the inventor of this box had the best intenions, and was most likely a physicist or highly competent engineer. The problem being that no one could simply walk up tot his thing and understand the intended functionality easily. So, a few hours of cursing and beating my hand ont he wall later, and I’ve at least got it to run 1 zone at a time in manual mode.
If you just want to read about the OS Pi, start here.
This leads me to the OpenSprinkler Pi. I figured someone had to have done something with sprinklers and the PI by now, so i googled, and this was hit number 4 (after a few idiotic ads that had nothing to do with my search).
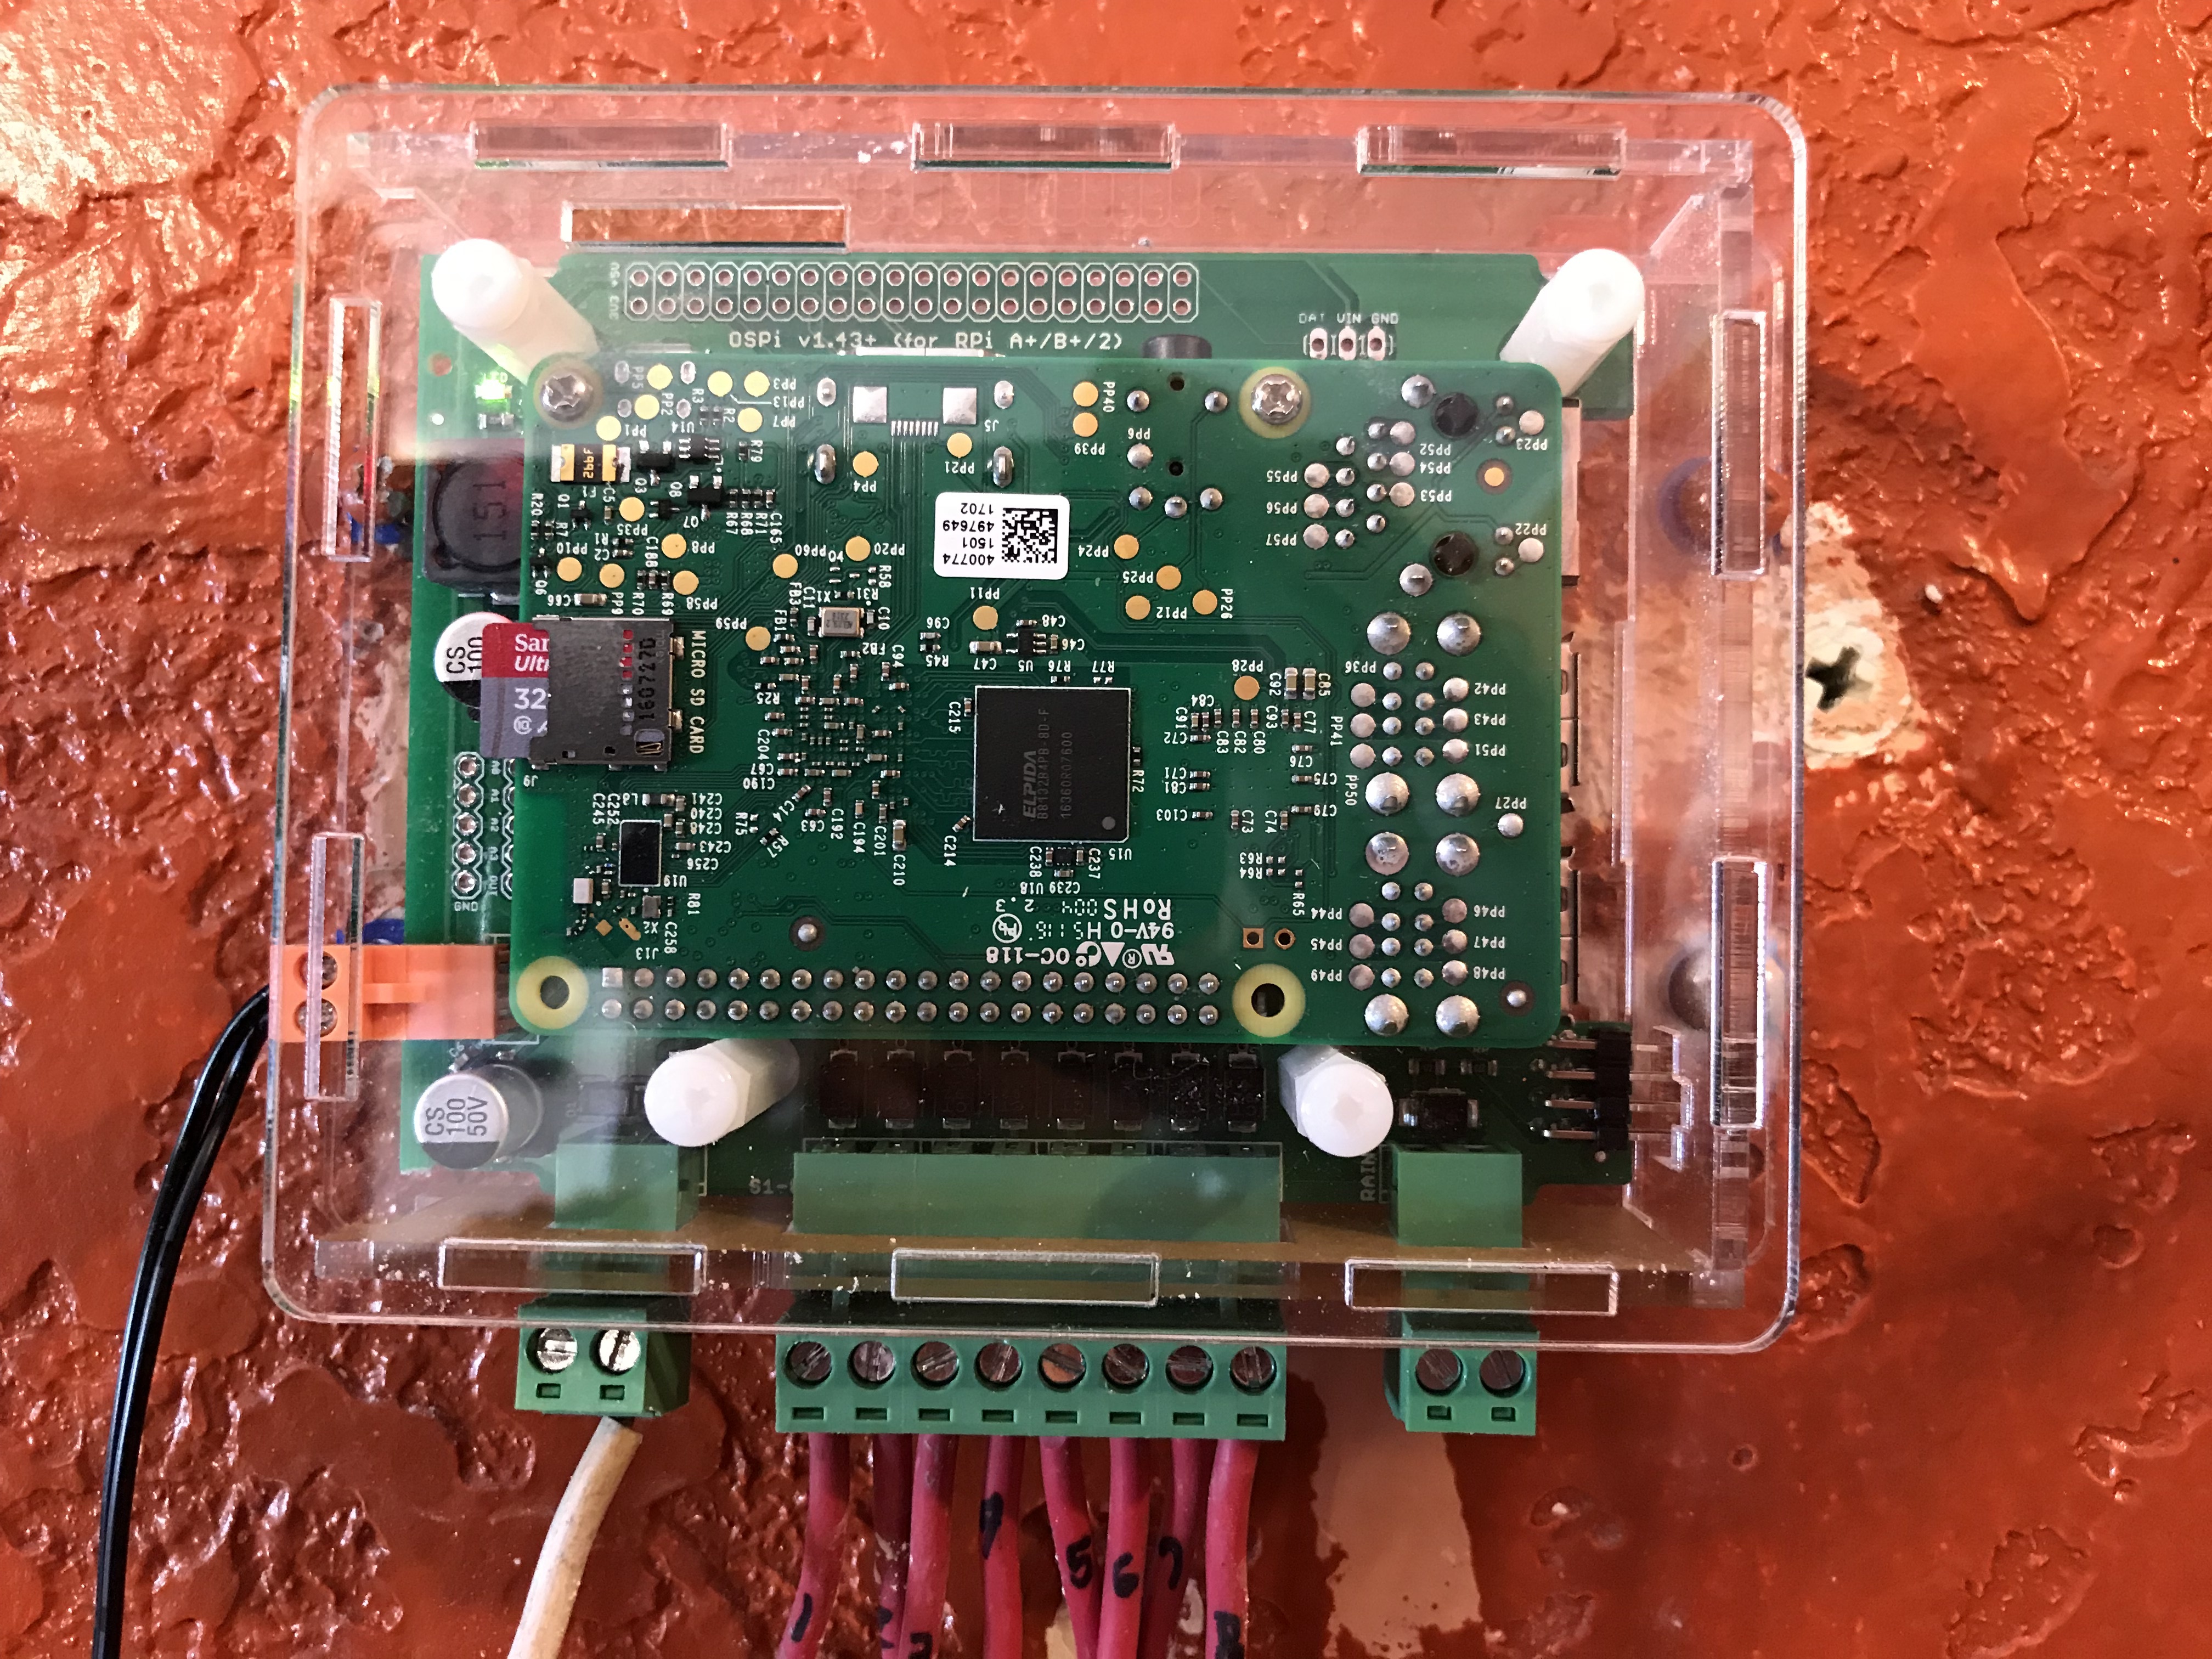
This guy made a controller board that sends the open and close signals to the zone valves in a sprinkler system, and then made it able to connect to a PI. Very cool.
I ordered it based on the video from 2014. The video showed a bit more of a simple setup than I received in the mail, but after a bit more cursing, double checking that I wasn’t missing any parts, and then letting @Lopezb29 (Beatriz) work on it, she had the whole thing put together.
What does it need.
- Raspian (just the CLI version, not the UI based version - though it wouldn’t matter per se).
- Wirless unless you want to run an ethernet cable to the controller location.
- The OS PI software from Github
- A bit of patience with the documentation (I wish I had made better step by step photos, and maybe a video, but I didn’t).
- Guts ( I was a bit freaked out about taking apart the controller and wires, but Bea and I got through it).
Step 1
Get a Raspberry PI 2 Model a or B and a wirless dongle, or a Raspberry PI 3 with Wifi built in.
Step 2
Install Raspbian Stretch on the PI.
I used the download straight from the Raspberry PI site, and the Etcher app to burn the image to the PI.
Step 3
Get the OpenSprinkler board and kit. You’ll need a 24V DC power supply as well (i ordered one from them).
Note: OpenSprinkler has a stand alone board, but I wanted to do something fun with my PI. Feel free to get their standalone board if you prefer.
Step 4
When Raspian is installed, boot it up and login (default username is pi, and default password is raspberry - you should change these immediately).
After logging in, you need to install Git,
sudo apt-get install git
Next, clone the OpenSprinkler PI program from Github.
git clone https://github.com/OpenSprinkler/OpenSprinklerGen2.git
Now cd into the new directory
cd OpenSprinklerGen2
Now run the installer script
sudo ./build.sh ospi
It runs really quick on a Pi 3.
Step 5
Setup SSH on the pi and enable it. Raspbian comes with SSH Server installed, but disabled. To enable it, use the command
sudo raspi-config
The config screen comes up. Arrow down to the Interfaces option, and press Enter. Now arrow to SSH and press enter. Tab to enable, and press Enter.
Now you can tab to Finish, and press enter, and you’ll be back in the command line.
Step 6
Next, make sure you’ve setup Wifi on the PI, you can use ethernet if you want, but you’ll probably want wifi long term. If you don’t have hard-wired connection for the git install, and git clone, they won’t work. So you’ll need to potentially do this step first.
To enable Wifi on a PI from the command line, you just need to edit a configuration file.
sudo nano /etc/wpa_supplicant/wpa_supplicant.conf
Now add these lines to the end of that file.
network={
    ssid="testing"
    psk="testingPassword"
}
In the above change “testing” to the name of your wifi network’s SSID, and change “testingPassword” to the password for your wifi network. Then save (CTRL+O), press Enter to confirm if needed, then exit (CTRL+X).
To enable wifi enter the command:
wpa_cli -i wlan0 reconfigure
Now you can do
ifconfig
and look for the wlan0 connection to find the IP for the PI.
In another computer on your network, or on your smart phone or tablet, open a browser, and type in the IP with port 8080, and you’ll be brought to the log in page of the OpenSprinkler Controller running on your PI.
Step 7
Let’s say my IP is 10.1.20.101 on my PI’s wifi.
I’d go to
http://10.1.20.101:8080
and that would bring me to the login page below.
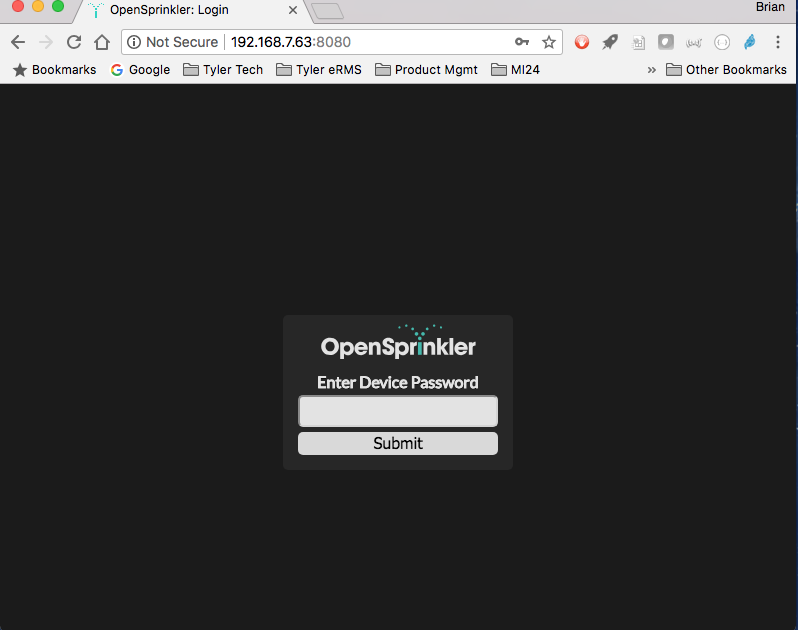
The default password is OpenDoor, again you should change this immediately.
Step 8
Now, we need to connect the PI to the OpenSprinkler PI controller board. Luckly, they did a good job of making this very easy.
In their instructions they give a great way to ensure you are turning everything the right direction.
The GPIO Pins on the PI insert into the female receiver on the OS Pi board. With the wire-harness for the valve connections facin you, turn the PI upside down with the USB ports and ethernet to the right.
Now insert the pins into the receivers, and push them together. The OS Pi guys supply a couple of posts to suppor tthe PI and space it from the board.
Step 9
Now that those are together, you want to start the Controller board. Get the 24 V power supply you should have by now. There should be 2 wires. On mine the wire with a light stipe on it went into the right hole of the orange wire harness, and the other into the left.
Connect the harness to the board, and plug it in.
2 things should happen here.
-
The light (green) on the controller board should come on immediately. It’s on the upper left corner with the valve harness facing you.
-
The LEDs on the PI (left end) should turn on and begin to blink.
If the green LED on the controller board doesn’t turn on immediately, unplug it and check your wiring.
If the green LED comes on, but the PI doesn’t, then check that you got the Pins aligned properly and inserted completely.
If you did, then you may just need to provide an external power source for the PI as well. I didn’t have to, but it could be the case.
Step 10
Now you need to wire up your valves.
You should mark the valve wires for your zones. If you don’t have them marked clearly on the wire, then do that before disconnecting them from your current controller.
Next, mark the valve positions on the OS Pi harness.
Side Note: Don’t get me started on the laser cut enclosure. One side wouldn’t go on, it was simply cut wrong. No biggie. But this thing was like a puzzle nightmare, and Beatriz finally solved it for me. I have now found there is a supposed video out there on putting it together.
The Common wire should be connected into the 2 wire port to the left of the valve harness.
Each valve wire should then be added to it’s proper position based on it’s zone number using the 8 ports on the main valve wire harness.
1 to the left, and counting over to the right.
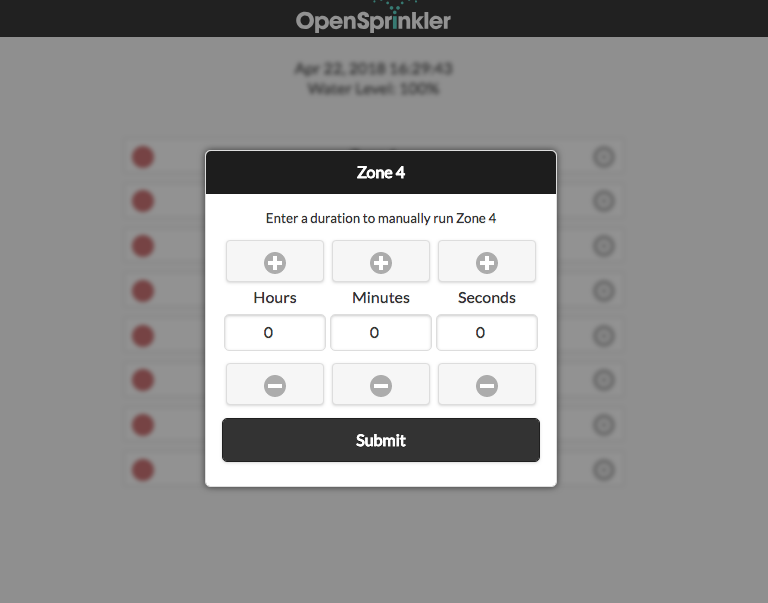
You can just attach 1 and test it using the web based interface. We used #4 because it was right outside the garage.
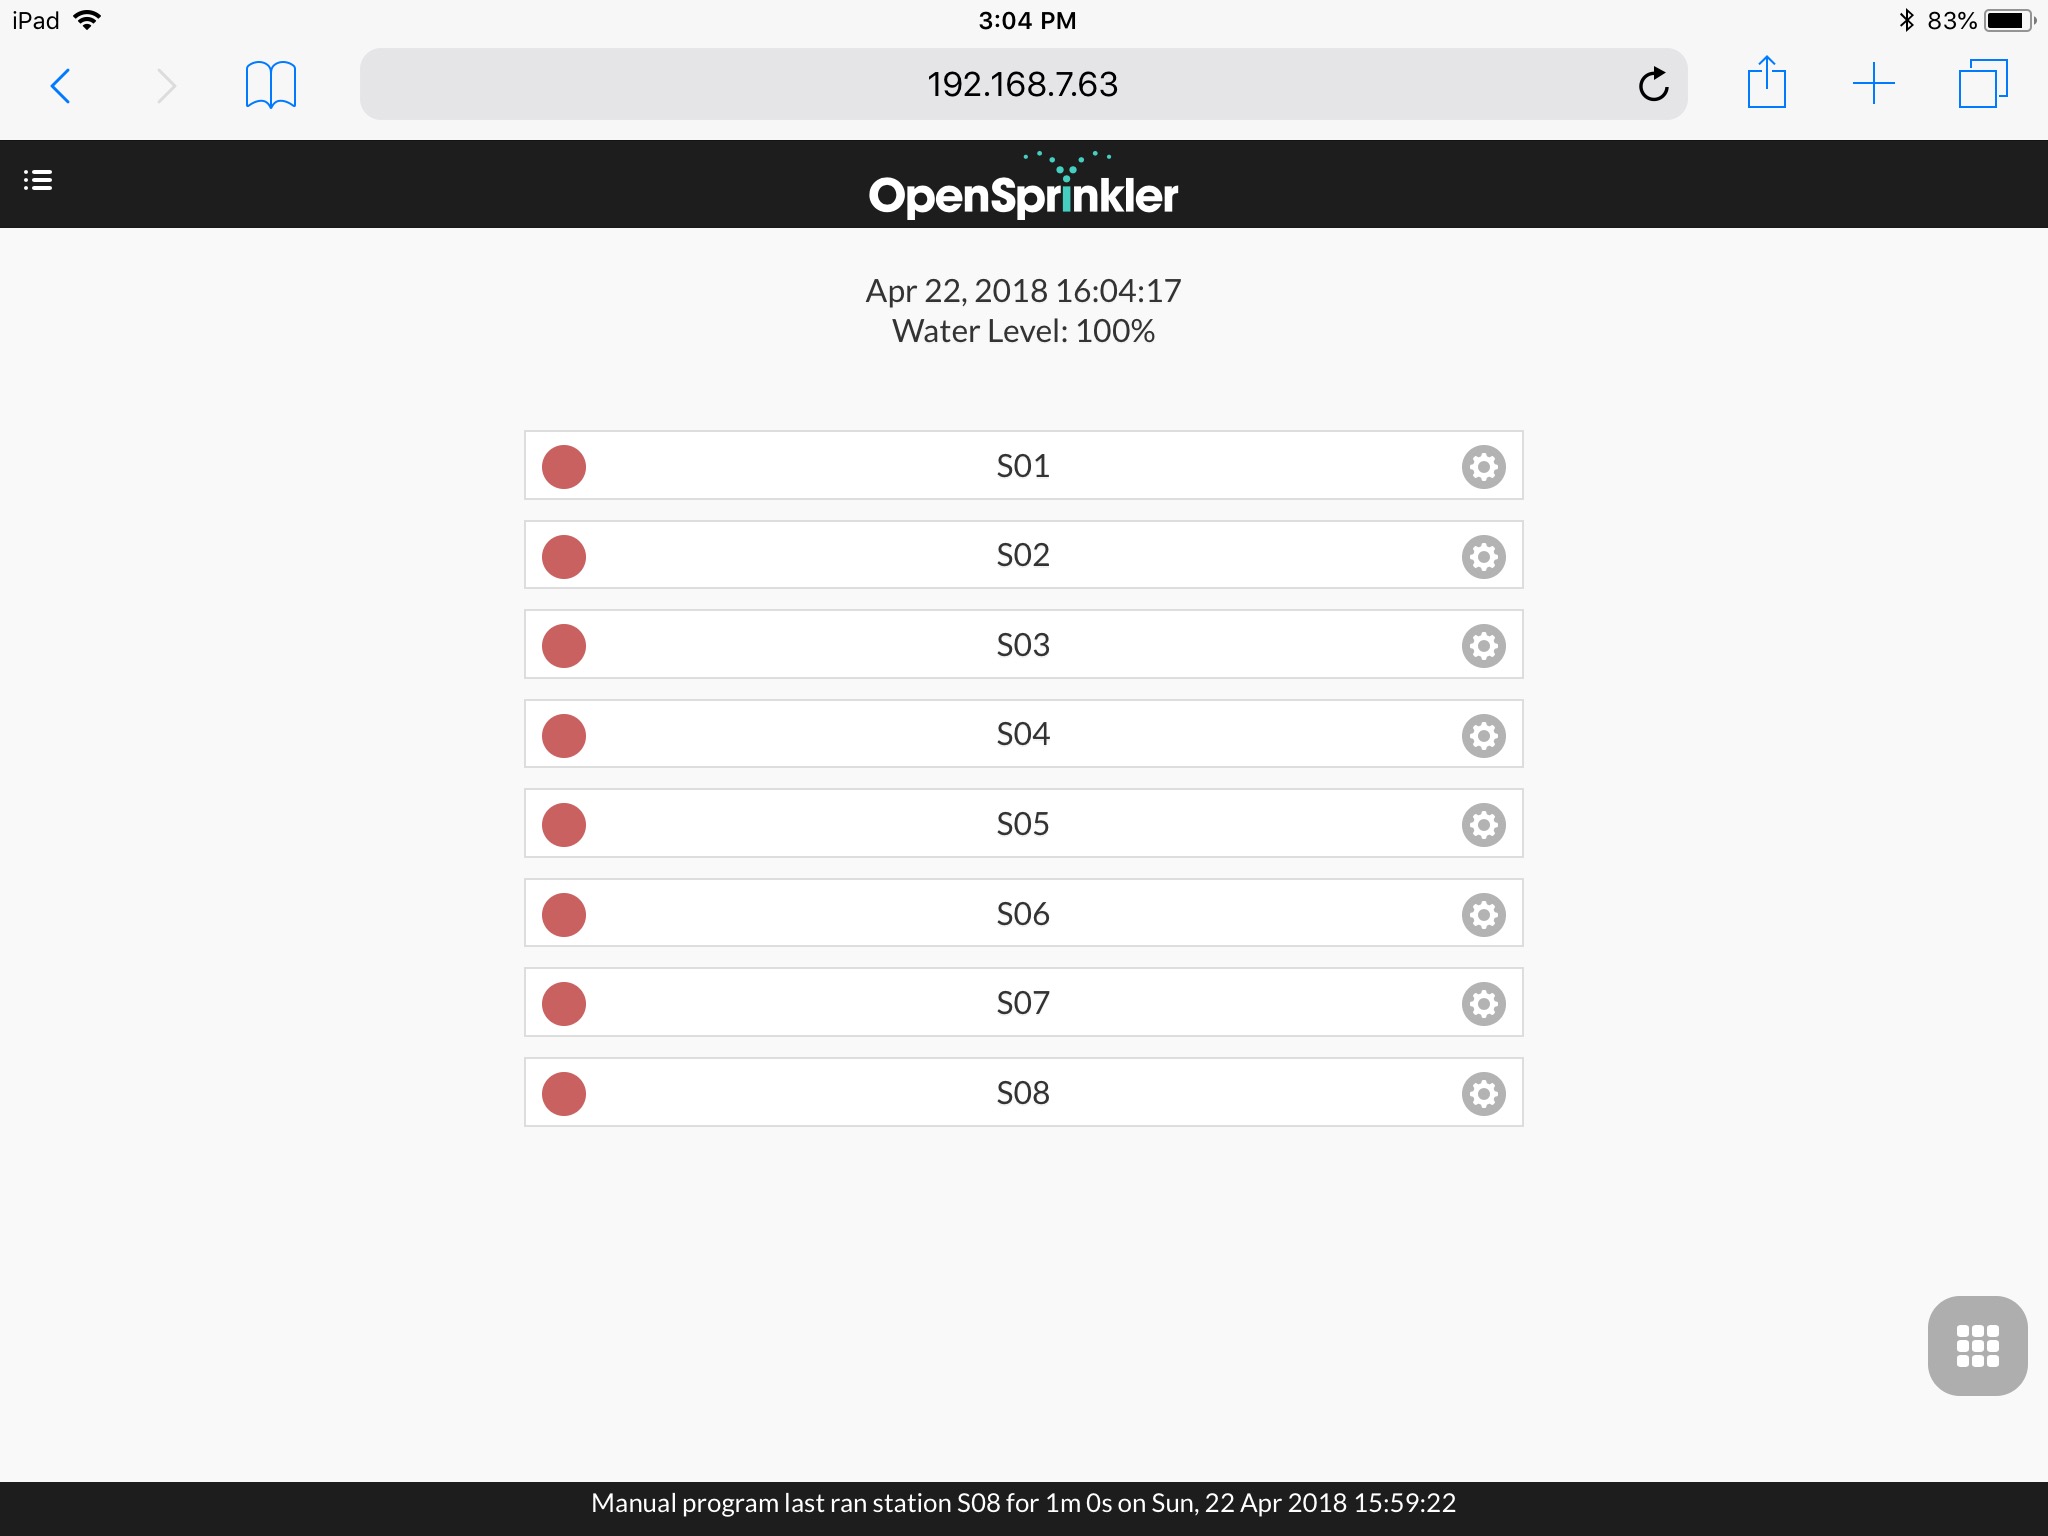
We set Zone 4 by touching it in the center, then selecting to run it for 1 minute in the pop-up view, then touching submit on the iPad.
Step 11
Once you know everthing is running and setup, turn off the Pi.
Always use the proper shutdown from the CLI, don’t just unplug it. The command is simple and easy to remember.
sudo shutdown -h now
Unplug it, and mark your holes on the base acrylic piece for the enclosure. Drill your holes, use studs where you can, and anchors for the rest, then hang it near your valve wires.
Plug it back up, check the lights, and connect.
We’ve already setup a schedule for the sprinklers to run on, and the UI is super intuitive (IMO). 10,000 times better than that Toro piece of junk.
I hope this post inspires you to do something fun, useful and cool with your Pi.